I managed to do a bit
of camping this Bank Holiday weekend and the weather was good enough to stay
dry….and so I decided to experiment a little by building my own ‘Hobo Stove’. Yes, that's right, we have a decent enough
income and lifestyle that frees us up doing what we like (when we're not
working) and I'm trying to act like a Hobo?
I thought I’d try and
make my own heat source from scratch rather than buy one of these portable
stoves that derive their energy source from gas canisters. Besides, it’s much more fun experimenting.
We arrived at the
Station Campsite, Carrog after a day of touring sunny Llangollen and Pontcysyllte.
The rain that started as we were driving to Carrog had stopped only to be
followed by more sun as we arrived (you cannot predict Welsh weather). We checked in, found our spot by the River
Dee and pitched up our tent.
Now for the Hobo
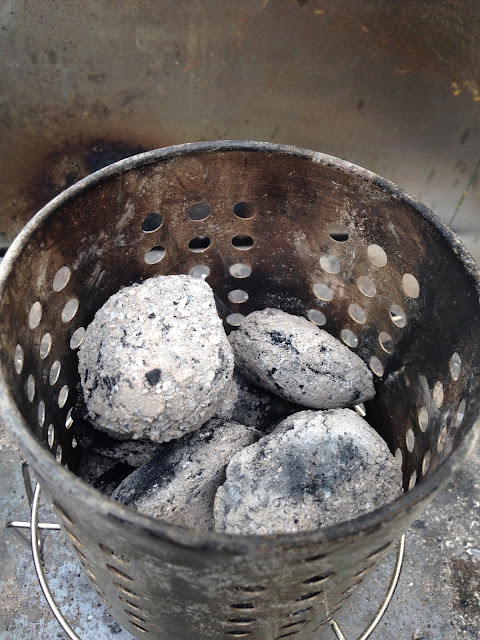
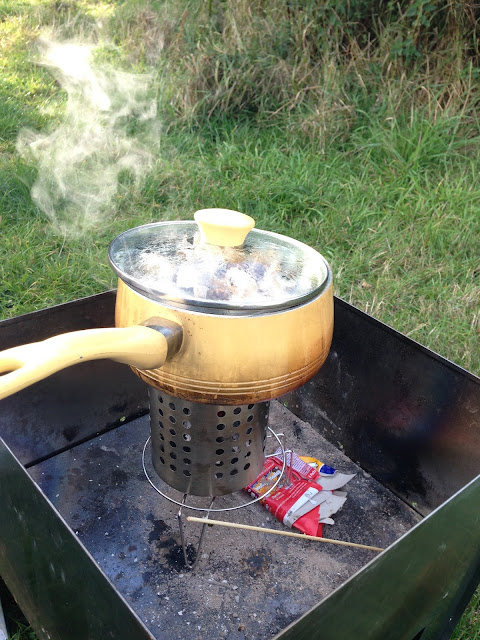
Stove: I used an old stainless steel IKEA utensil caddy (the one with the holes
on the side and bottom) and stood it proudly on a metal wire pot holder in my
fire pit.
I used an empty toilet roll
stuffed with cotton wool soaked in paraffin (Vaseline) as my fire-starter for
the charcoal briquettes.
The cotton wool
catches the sparks from my flint easily and the paraffin burns long enough to
light the charcoal briquettes.
Once the
fire got going I lowered the briquettes carefully on to the fire using my tongs,
being careful not to smother the fire out too soon. The holes in the caddy are excellent for
providing oxygen to help the fuel burn.
I would occasionally waft my camping plate at the side of the stove to
try and help the briquettes burn, but this probably wouldn't have been
necessary had the wind picked up.
 |
| because every one keeps the cardboard from their toilet rolls, right? |
 |
| Come on baby... |
 |
| Fire starter...twisted fire starter. |
 |
| getting there... |
 |
| burny, burny |
 |
| is it done, yet? |
It took about an hour
for the stew to boil, but the briquettes gave out an even heat. There was no need to try and control the temp
of the stove, but I did have to occasionally prop up the lid on the pot to
adjust the outlet of steam.
After 2 and a half
hours of cooking:
Dinner was ready.
The briquettes burned
for another 2 hours after and emanated enough heat to toast some marshmallows
to make S’mores for dessert. Except we didn't have any marshmallows…
*The Grouse Inn was a
5 minute walk from the campsite and served non-Hobo food – I think Suzanne’s
definition of success versus failure was the complete opposite of mine.

No comments:
Post a Comment